 |
 |
| "Give me candy or I'll suck your blood!" | |
|---|---|
 |
 |
| Creepy capes | Love the demon eyes! |
Friday, August 30, 2013
Double Drac
Meanwhile, our son has caught the Halloween spirit and got out his Dracula costume to try on. He wants to go as Dracula for at least part of Halloween this year, so he can match my costume (aww!). So I dragged out mine, and we took a couple of pics.

Weeping Angels- Phase 2
Yep, I'm confident enough to call it Phase 2. Got 3 torsos built, and a complete set of arms. Also cut the wire for the remaining two sets. And I've got a plan for molding the hands. We've got the stuff to make Monster Mud (drywall joint compound mixed with latex paint), so as soon as the other Angels are built and everyone's been fitted, we can start final assembly- maybe this weekend?!
 Hard to see in this photo, but she's got her arms on. I'm planning to rework the shoulders to a more sloping design, right now she looks like there's a lot of padding.
 Speaking of padding, my first attempt at forming her shape didn't work out so well. The plastic bags I used expanded and gave her the appearance of- uh- enhancements...
 From the side, you can see the arms- and the issue I mentioned above. For some, completely unrelated, reason, she has a tendency to tip forward. SpiderWitch has promised to help bring her back into balance.


Progress, painful painful progress
Got the logs for the fire done, and finished the torsos for the Angels. All in all, a pretty productive day. However, it came with a cost- I look like I lost a fight with a bobcat thanks to the chicken wire. That stuff is just EVIL!!! Both legs, both arms, hands and feet are covered in scratches where the wire rolled back on me. But, I think it was worth it overall.
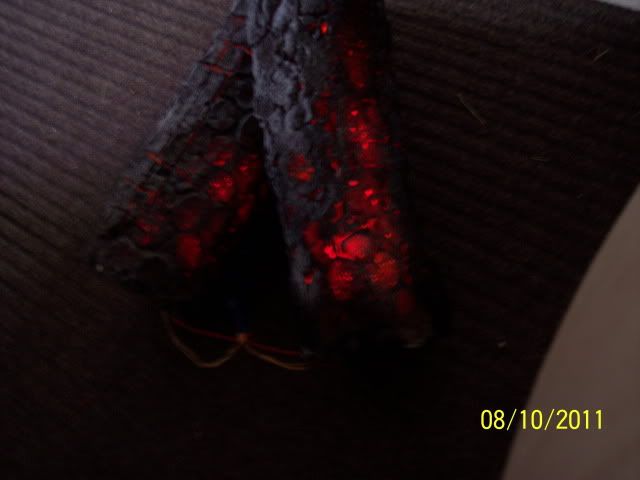
Finished cutting the logs, shaping them, and painting them. Did a quick light test to see how they look:
 The lights are orange and a red-violet color which looks very pale in the photo. The logs have the red lights inside them, while the orange lights are gathered into a pile in the center beneath the cauldron.
 I think I need to cut a few more holes in the logs to get the glow I want. Also some shorter strands of lights, or fewer of them. But now that the prop is basically done, I can play with the lights as I get time.
 The cauldron is a nice glowing green- it's much brighter and lighter in real life, but this is also an interesting color. You can't see any of the cauldron detail, or the logs, but that's okay- they're more for the daylight when the lights are turned off.
Finished cutting the logs, shaping them, and painting them. Did a quick light test to see how they look:


Monday, August 26, 2013
Updated Logs
Took an x-acto knife to the logs this afternoon, trying to make more of a charred effect. Didn't like it. So I took my pocketknife to the other log, for a much better (more random) effect. I'll put the first log in the back of the display.
In the first pic, you can see the cuts I made with the x-acto knife. I need to paint it to touch up the edges, but the cuts are too evenly spaced- too "perfect". Not quite the effect I wanted.
Here it is without the flash. Much more light than previously, but the pattern is just- odd.
 So here's the new test log- I haven't painted it (I haven't even decide if I'm going to cut it in half), but I did cut some grooves into it. More light and in more unpredictable patterns. It's a bit more promising, we'll see how it looks with paint.
 Again without the flash. Lots of light showing through the grooves, gaps, and the cuts I made with the pocketknife. More random. But it's HUGE! I'll probably cut it in half, maybe thirds.
So the foam logs aren't PERFECT, but they're better than nothing. I can put some real logs with them and it'll help the illusion- plus, the cauldron will be sitting on top of them and that will hide some of the imperfections. If I were to do this again, I think the key would be either the pattern of the foam, or putting some kind of exterior mold on while it's being sprayed or drying.
 |
 |
So the foam logs aren't PERFECT, but they're better than nothing. I can put some real logs with them and it'll help the illusion- plus, the cauldron will be sitting on top of them and that will hide some of the imperfections. If I were to do this again, I think the key would be either the pattern of the foam, or putting some kind of exterior mold on while it's being sprayed or drying.
Saturday, August 24, 2013
Glowing Log Effect
After a quick trip to Lowes, we started working on the fire for the cauldron. Following the tips I've labelled previously, I created the chicken wire forms:
When that was done, I stuffed them with plastic bags, which were stuffed in turn with plastic bags:
Once complete, I sprayed them all with expanding insulation foam. Great Stuff indeed!
They turned out bigger than I had planned, so I cut one in half, then folded it into a smaller cylinder. The foam had no problem bending.
Once dry, I sprayed them with a base coat of flat black, followed by a top coat of textured spraypaint- it didn't really look like the can, but worked well enough I guess:
Next step was to wait for nightfall to do the lighting tests. The captions below explain it.
Overall, this was a pretty easy and effective project. The logs look close enough to the real thing during daylight, and at night it'll be too dark to notice anything beyond the lights. The amber LEDs aren't going to work though- I'll try again with orange and/or red.
 |
| About a foot square |
When that was done, I stuffed them with plastic bags, which were stuffed in turn with plastic bags:
 |
| One filled bag stuffed into each end was sufficient. |
 |
| I had several people stop in the middle of the road to ask what these were! |
Once dry, I sprayed them with a base coat of flat black, followed by a top coat of textured spraypaint- it didn't really look like the can, but worked well enough I guess:
 |
| Not too bad. |
 |
| LEDs on, with flash |
 | |
| LEDs on, no flash |
 |
| Photoshopped the first two images to highlight the details |
 |
| Added the cauldron, then photoshopped two images together |
Overall, this was a pretty easy and effective project. The logs look close enough to the real thing during daylight, and at night it'll be too dark to notice anything beyond the lights. The amber LEDs aren't going to work though- I'll try again with orange and/or red.
Thursday, August 22, 2013
Gotta stay off the internet...
Okay, I've finished one project of six...and I'm about ready to add a couple more!
First up- I've found the way I want to do the fireplace for my new cauldron, courtesy of Halloween Forum
It uses expanding foam and chicken wire to create a "log", which is then detailed with textured paint and stuffed with lights. The end result is shown below:
The next project is a great way to cover the garage door:
Images courtesy of the original owners, posted at Halloween Forum. If you're interested, stroll on over to Eerie Acres Cemetary and check out the rest of his stuff. The guy who posted the log tutorial doesn't have a site, but he goes by the handle OctART at HF.
At this rate, I'll NEVER finish!
First up- I've found the way I want to do the fireplace for my new cauldron, courtesy of Halloween Forum
It uses expanding foam and chicken wire to create a "log", which is then detailed with textured paint and stuffed with lights. The end result is shown below:
 | |||
| Pretty sweet |
 | ||
| Simple, but effective |
At this rate, I'll NEVER finish!
Tuesday, August 20, 2013
Weeping Angel- Phase .5
Bought the angel costumes, plus a set of feather wings (the ones with the costume were pretty poor), and a Greek goddess costume. So we'll have 3 distinct angels. Next step is to stuff them, make the armature, and start working on the dresses. I'm thinking of stiffening the material with starch to hold a basic shape, then slowly applying the mud to it.
Meanwhile, we need to take measurements of SpiderWitch's arms and transfer them to cereal boxes to cut out forearm/upper arm templates- we'll tape those, mache them, then smooth them out and paint them. Still have to figure out hands.
Also started work on the fire for the cauldron- it's going to be foam and chicken wire "logs" with lights shining from inside.
I'll get the stuff for the camera mount when we get the PVC for the armatures.
So- 1 project down, 3 others in various stages of prep, and 2 to start.
Meanwhile, we need to take measurements of SpiderWitch's arms and transfer them to cereal boxes to cut out forearm/upper arm templates- we'll tape those, mache them, then smooth them out and paint them. Still have to figure out hands.
Also started work on the fire for the cauldron- it's going to be foam and chicken wire "logs" with lights shining from inside.
I'll get the stuff for the camera mount when we get the PVC for the armatures.
So- 1 project down, 3 others in various stages of prep, and 2 to start.
Subscribe to:
Posts (Atom)