Our family's Halloween page. All about our props, costumes, special effects, and the lights and music which go into our haunted house display. Pics and explanations and short video clips showing the actions.
Still limping along with the boot of shame, so nothing new to report on outdoor prep. Been planning to do a test with the fog machines to see how much coverage we get, how dense it is, and so forth. Went out tonight to turn off the LED tea lights and votives, and saw that Nature had jumped the gun with a fog display of her own:
Looking out the front door. Cool moonlight on the graveyard.
View from the street.
The "girls" are lurking in the mist.
The house as seen from across the street.
The fog is much thicker than it appears through the lens- visibility is about 50 feet, with details washing out around 20 feet or so. Looking out the front door, there's a heavy mist along the walkway which bounces the light from the floods around and scatters it, creating some eerie shadow effects as you walk.
Despite the broken leg, I got up on the ladder and hung the background lights up- I think that gives enough ambient lighting for the porch, and the amber color complements the glow from the LEDs.
Some pics with the camera, a bit less blurry now that the shutter doesn't have to stay open so long:
The view looking up from the street. The blue spot hits the tombstones, the front walk, and the Weeping Angels by the garage, casting deep shadows.
I think the blue is an improvement on the red light from last year- the shadows are cooler, giving it more of a moon-glow feeling.
Closeup of the tombstone area. This is always a hit with the families- they have their kids pose in the graveyard and take photos. Very satisfying to see how much they enjoy the atmosphere.
The Weeping Angels- not as good as the BBC version, but they still look creepy at night. They need a better home- we'll work on that next Halloween.
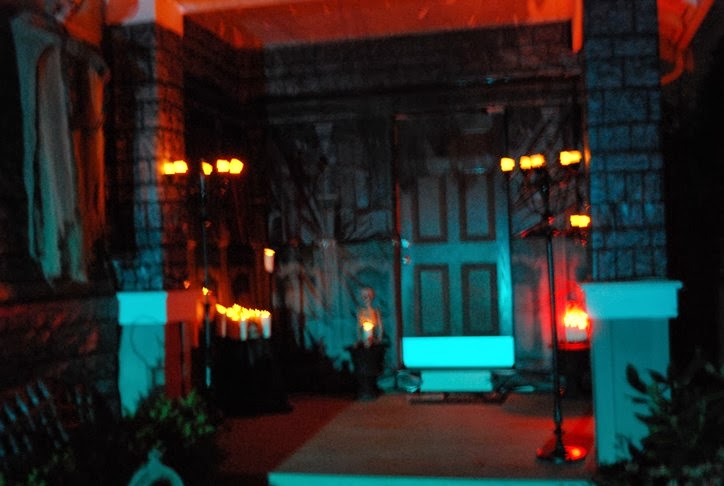
The front porch. It's not really this bright, but the exposure makes it look that way. There's enough light to safely get up and down if you're wearing a costume, but not much more. The LEDs work well with the candles, blending in with the yellows and oranges.
The skull table. Not much to say here- it's a good way to display the candles since we don't have any more fixtures to place them on.
You can sort of see the detail of the "wax" dripping down the sides- hot glue makes a suitable substitute. The paint was antique white, which gave a nice ivory color to the PVC and glue.
The left side of the porch, showing the wrought iron stands and the table. It also shows off the Scene Setter background SpiderWitch found- very nice!
Right side of the porch, candelabra and taper candles with C7 flicker bulbs. Next year we're going to make all the candelabras and candles hardwired to a plug- running up and downstairs to turn everything on/off is tedious. Painful with a broken ankle.
I thought I had sprained it- ran for the bus and landed wrong on my right foot- and it was just taking a long time to heal, but I finally went to the doc and they showed it broken in two places. So now I'm wearing the "boot of shame" for the next three weeks.
Meanwhile, no climbing on ladders and no prolonged standing- so no work on projects. Good news is we're mostly done. I should be able to fix the rest of it up this coming week.
After a four-day marathon of activity, 3 hours after work Thursday and Friday and 9 hours Saturday and Sunday, we're "done"...
The to-do list consists of building the fog chillers, wiring the Angels to their final resting places, and taping the last scene setter to the garage door(s). I've got one more project which SpiderWitch added today (!!), but that won't take more than an hour. So for all intents and purposes, we're finished with our build.
Here's the front entrance:
At 6:30 pm you can barely make out the lights
At 7:15, it's fully lit. Much dimmer than it appears here, though
SpiderWitch wanted to do a "New Orleans" style cemetery, with the burial urns and lots of candles:
Cauldron Mk 2, now water resistant!
Grave flowers? Check. Lots of candles? Check.
Someone got up too early. Or is it late?
The twinkle lights and flicker candles look great!
And some random pics around the haunt:
View from the street.
Not a great shot, but this is the "test" ghost. It looks blue, but that's actually from the blacklight. I think it'll look better away from the blue floodlight.
Don't Blink!
Everyone who walked by asked where the Angels were. So I gave in to the crowd and added one. It looked REALLY creepy with the blue light throwing the deep shadow on the garage, and if I didn't know better, I'd SWEAR it moved...
The skull surrounded by candles- classic horror!
And finally, some videos. Picture doesn't show the color, but you can see the flicker effects.
Not much to report today- the storm continued to dump on us all day long, with little pause. Still, I was able to work on the porch, cutting some more candles out of the PVC. I've got one 5 foot section to go, but with 15 feet cut I've got just under 30 candles between 6 and 8 inches high (for some reason, I ended up with 3 7-inch candles).
I tried to use the hot glue gun SpiderWitch bought me, but it didn't work- never got hot enough to create the drips I need to look like melted wax. So, that's on hold until we get a better gun. Meanwhile, though, I'll glue some of the candles together to create groups.
I've also been browsing a bunch of web tutorials on hard-wiring the tea lights. This would be a LOT easier than manually turning them on and off every night, not to mention cheaper as we wouldn't have to replace batteries. It seems fairly straightforward, but I've got more research to do.
This week was a literal washout- rain off and on all week, so only limited work outside. The forecast for Saturday looked good, so I planned out my projects intending to accomplish them in one marathon session.
Nope.
Huge storm moving through the region- heavy rains all day today, accompanied by strong wind gusts. Forecast for Sunday doesn't look any better. So much for getting everything done.
There were a couple of projects we had on the back burner, so I moved them up to the front. First thing was to soak a bunch of fabric in Rit Fabric Whitener, to give them a nice fluorescent capability. They'll be turned into some ghosts rising from behind the tombstones on the other side of the yard. We'll hit them with a blacklight for a nice glowing effect. The idea is to do something similar to the ghoulish figures in Fantasia:
The best part is when they first come up from the grave...
Next up was a continuation of the lighting for the front porch. The candelabras look great, but don't give us enough light for the trick or treaters. We either have to use an overhead light source, or add more candles.
More candles it is.
Through the use of LED tea candles, PVC pipe, and hot glue, we can create a large number of pillar candles quickly and cheaply. I was able to knock out about a dozen this afternoon in under 2 hours. We still need to add the hot glue and then paint them, but we can do that anytime, anyplace. Ideally, this will give us the necessary light level.
The next step is to drip hot glue down the sides to create a melted wax effect.
Then spray paint the entire thing a nice candle color and you're done!
We'll have to find some way of displaying all the candles
without it turning into another major building project.
The downside is turning on/off 50+ LEDs twice each night
But they look pretty cool...I guess it's worth it!
Next week we start setting everything up. I was hoping to have it all done, and not still building it during October, but as SpiderWitch pointed out, people like walking by and watching us set up the various parts of the haunt. So I guess if we still have to build a few things, it's not so bad. The hardest parts are finished at least.
Took advantage of the calm before the storm (tomorrow) to work on our last few projects. First up was the Scene Setter- got that taped to the weed fabric, so the next step will be to hang it and mark the grommets, finish taping the seams, and then cut it to fit the wall. The hard part is done though.
After that was finished, I weathered the tombstones with a bit more black paint, then drybrushed with a sponge to get a lighter gray highlight. Added some orange-gray spots of lichen, then glued moss to make it look like it's been in the ground for years and years. Turned out pretty snazzy I think:
That's a lot of tombstones.
Some close ups:
Final project was the sign for our cemetery. It was originally green with gray writing, but I figured a metallic look would be better.
Might add glow-in-the-dark paint to the silver lettering.




.JPG)


.JPG)


